Category: Seasonal Activities

Fun and creative seasonal art activities for kids, inspired by nature, holidays, and special moments throughout the year.

  • Fun Recycled Art and Gardening Project for Kids

    In today’s lesson, we will create our own mini garden and house using recycled materials. Students will plant seeds, observe plant growth, and use their imagination to design a unique garden that tells their own story.

    Learning Objectives

    • Students will create a creative artwork using recycled materials.
    • Students will understand basic plant growth through hands-on gardening activities.
    • Students will develop imagination and self-expression by designing their own house and garden space.
    • Students will engage in hands-on, independent, and collaborative art activities.

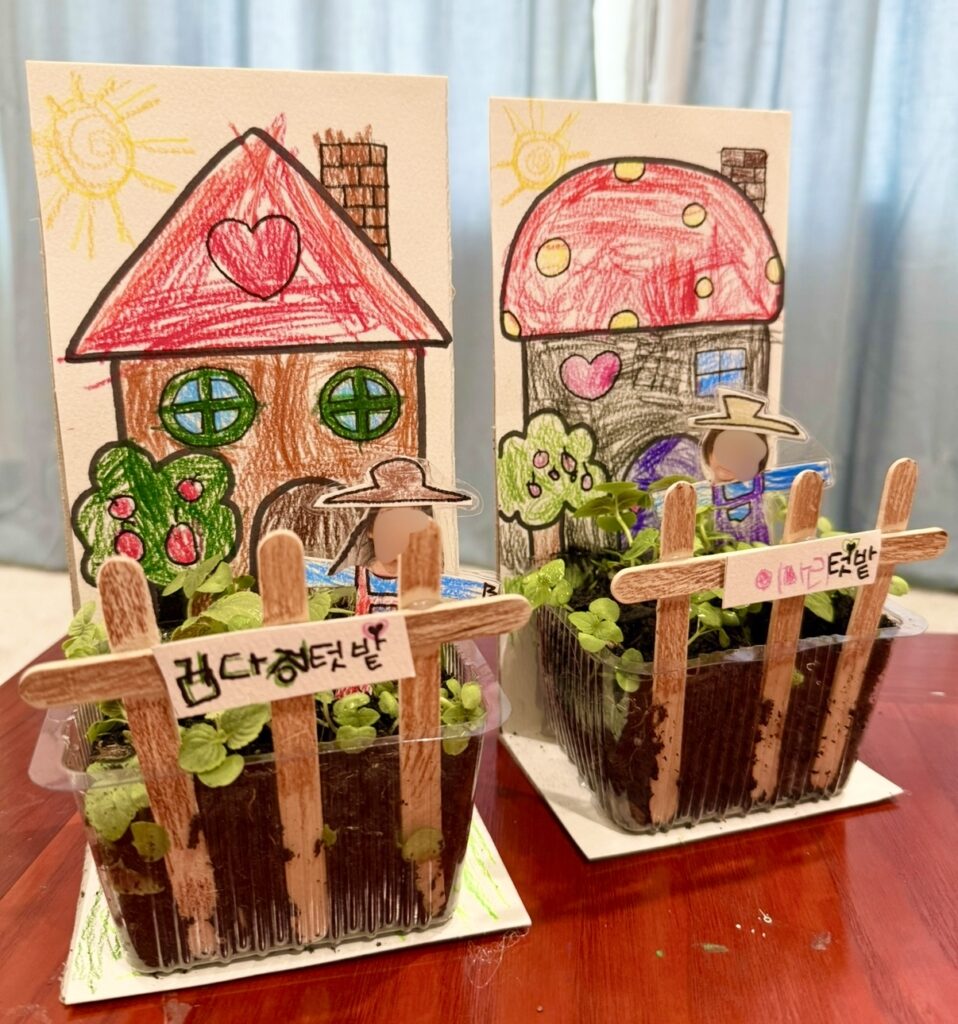
    This creative hands-on art project combines recycling, gardening, and imaginative storytelling. Students build a small garden using recycled materials such as milk cartons, plastic snack containers, and cardboard boxes. They then fill containers with soil, plant seeds, and design a small garden space.

    To add a personal and playful touch, students take a photo of their face, cut it out, and turn it into a scarecrow figure to place inside their mini garden.

    This project encourages creativity, environmental awareness, and hands-on learning while connecting art with nature.

    Materials

    • Small plastic containers or milk cartons
    • Cardboard boxes
    • Soil
    • Seeds
    • Glue
    • Scissors
    • Tape
    • Coloring materials (markers, crayons, or paint)
    • Printed student face photos
    • Craft sticks (popsicle sticks for fence decoration)

    Lesson Procedure

    1. Cut a cardboard box to match the width of a small plastic container, and adjust the height to approximately 25 cm (about 10 inches).
    2. Draw a house design starting from the top edge of the plastic container upward. Depending on the age group, older students can draw their own houses, while younger children can use a teacher-prepared outline to color in.
    3. Encourage students to decorate the house and surrounding area with creative elements such as the sun, trees, flowers, and animals.
    4. Glue the completed house design onto the plastic container.
    5. Create a fence using craft sticks (popsicle sticks) and decorate them with color.
    6. Fill the container with soil, plant seeds, and water them.
    7. Attach the fence to the front part of the garden.
    8. Make a small name sign reading “___’s Garden” (students write their own names, while the word “Garden” is written by the teacher). Place the sign in front of the garden.
    9. Create a scarecrow by either drawing and coloring it or using a pre-made template. Attach the student’s printed face and add a hat for decoration. Secure the scarecrow using tape or lamination for durability.

    Today’s garden is not the end, but the beginning. Continue to observe how your seeds grow and notice the changes in nature. Share your creative garden stories with your classmates and enjoy the journey of growth.

  • Cardboard Rainbow Collage Wall Hanging 🌈

    Turning an ordinary shipping box into a colorful world of imagination!

    Do you ever look at leftover cardboard boxes and feel like they’re too good to throw away?
    This fun art activity transforms a simple shipping box into a bright rainbow wall hanging filled with texture, creativity, and imagination.

    Children paint their own rainbow, explore collage techniques with a variety of materials, and create a piece that feels truly personal.
    The most magical part? Adding their own photo into the artwork turns the project into a story they can actually imagine themselves inside. ✨

    And once finished, it becomes a beautiful decoration for the classroom or home!


    🌈 Learning Goals

    • Learn the 7 colors of the rainbow
    • Explore different textures and materials
    • Experience collage art techniques
    • Practice creative decision-making
    • Reuse recyclable materials in art
    • Connect storytelling with visual art

    👧 Recommended Age

    Preschool – Early Elementary


    ✂️ Materials

    • Cardboard shipping box
    • Scissors and pencil
    • Paint or coloring materials
    • Glue or hot glue gun
    • Colored paper, wrapping paper, ribbons, buttons, fabric scraps, and other mixed materials
    • Light blue paper (for clouds)
    • Cotton balls
    • String or ribbon
    • Printed student photo
      (A playful “sliding on the cloud” pose works perfectly!)

    Instructions

    1. Create the Rainbow Shape

    Cut the cardboard into a large rainbow shape.
    Then divide the inside into 7 sections to create the rainbow bands.

    Kids absolutely love working on oversized artwork, and it looks so cheerful once displayed on the wall!


    2. Paint the Rainbow

    Invite students to paint the rainbow in rainbow order: red, orange, yellow, green, blue, indigo, and purple.

    It doesn’t need to look perfect.
    Each child colors differently, which makes every finished rainbow unique and full of personality. 🎨


    3. Add the Collage Materials

    This is usually everyone’s favorite part!

    Instead of assigning specific colors to specific sections, students are encouraged to freely choose materials and place them wherever they’d like.

    Shiny wrapping paper, soft fabric scraps, textured buttons—every material adds a different feeling to the artwork.

    The focus of this activity isn’t “following rules.”
    It’s about giving children the freedom to experiment, combine, and create in their own way.


    ☁️ 4. Make the Clouds

    Cut cloud shapes from light blue paper and glue cotton balls on top to create fluffy clouds.

    The soft blue background makes the rainbow feel even brighter and gives the whole project a dreamy sky-like look.


    ☁️ 5. Arrange the Clouds

    The clouds do not need to be placed in a certain spot.

    Some children place them under the rainbow, others place them above or off to one side—and honestly, those creative choices often make the artwork even more charming.


    6. Imagination Extension Activity (The Kids LOVED This Part!)

    Take a photo of each child pretending to slide on a cloud, print it out, and attach it onto the artwork.

    Suddenly, the rainbow becomes more than just an art project—it turns into a magical scene where the child becomes part of the story. 🌈

    This simple addition sparks so much imagination and gives children a stronger emotional connection to their artwork.


    7. Turn It Into a Wall Hanging

    Attach a string or ribbon to the top of the rainbow and hang it on the wall.

    These look absolutely adorable displayed in a classroom, hallway, or even at home!


    Why This Activity Works So Well

    • Encourages open-ended creativity
    • Introduces collage art naturally
    • Explores texture and mixed materials
    • Builds confidence through personal choices
    • Combines storytelling with art
    • Reuses recyclable materials in a meaningful way
    • Creates a keepsake-style art piece families love

    Children’s imaginations are always bigger and more colorful than we expect.
    What started as a simple cardboard box became a rainbow world filled with creativity, texture, and joy. 🌈